12 The Horn
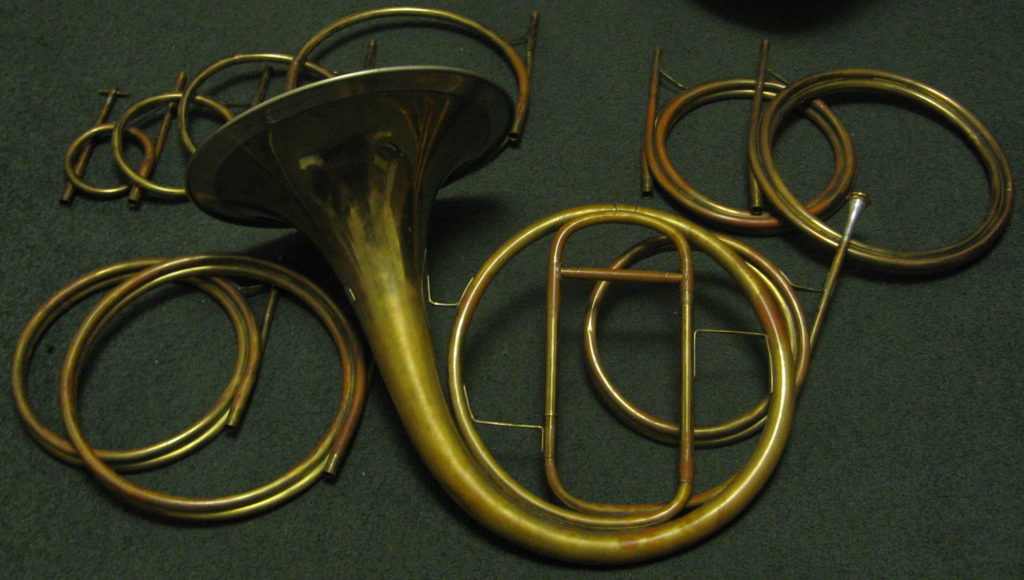
The horn has its origins in primitive times, taking both its name and original shape from animal horns which served as the first musical horns. Over time, the modern wound design has become the standard instrument, starting with natural horns without valves and eventually developing the rotor systems we are familiar with today.
The origins of the horn without valves or rotors leads to one of the reasons it comes in many different keys. Originally, horns had crooks, which were additional slides added to a horn to change their length and, by extension, key. While the horn in the key of F has become the norm, keyed horns were used frequently through the Classical period and horns in Eb and Bb are still found in music for brass and concert bands.
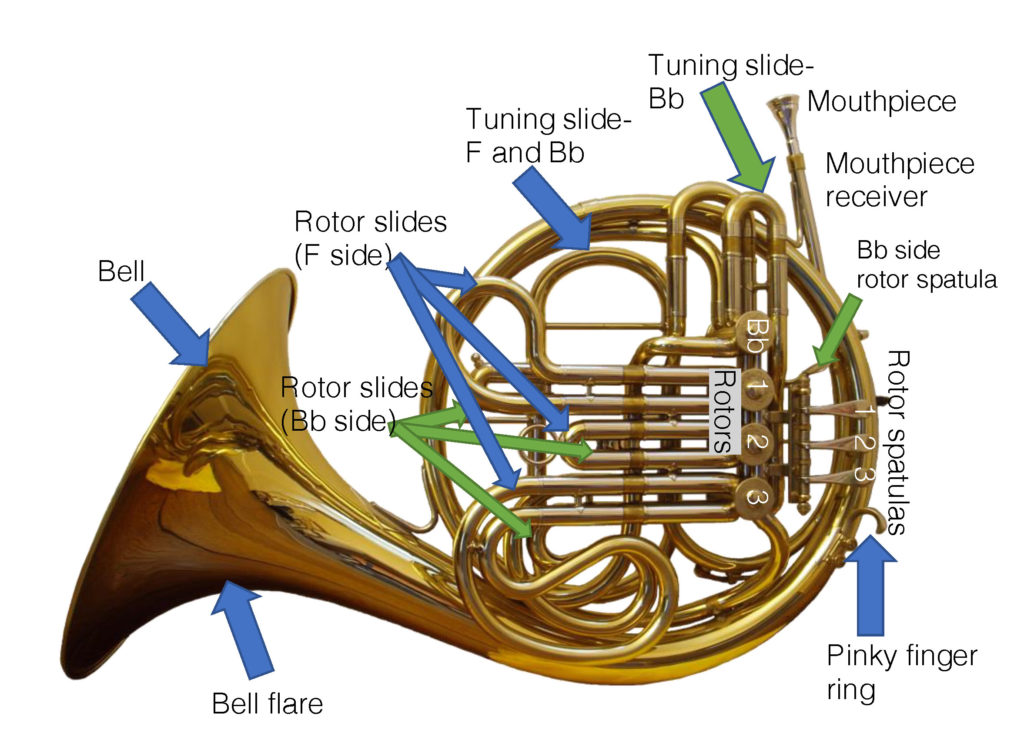
The modern horn is often found in two varieties: the single horn (pitched in F) and the double horn (pitched in F and Bb). The difference between the single and double horn is that the double horn has a fourth rotor, controlled by the thumb on the left hand, which changes the instrument from F to an instrument pitched a fourth higher in Bb. This rotor removes around four feet of tubing from the horn, allowing for a different set of possible fingerings and improved precision in the upper register. While some students will start on a single horn because it is a lighter and less expensive instrument, it is advised that they transition to the double horn for its greater versatility and improved intonation.
Until the second half of the 20th century, it was common for schools and school band literature to include parts for Bb and Eb horn. The Bb horn is smaller than and is pitched up a perfect fourth from the F horn, while the Eb horn is larger and is pitched down a Major second. Different variations of double horns have also been used. Teachers will want to be aware of these variations in case they encounter an older horn still in use with unusual pitch tendencies.
A commonly used relative to the horn is the mellophone, which can be found in marching bands. The mellophone is a bell front instrument and is ideally designed for outdoor projection without the finesse of tone found in the horn. Its timbral qualities fall somewhere between trumpet and horn. Similar to horn, it is pitched in F, allowing it to serve as an alto voice in the ensemble. Dependent on manufacturer, the mellophone can have two primary differences. First, many use a trumpet mouthpiece (allowing trumpet players to easily switch to the mellophone). Second, the mellophone is technically pitched an octave higher than the horn, so while still keyed in F, it utilizes the same fingerings as the trumpet when reading the music. A less common variant today is the marching horn which is pitched in Bb.
A quick side note–in the United States, the horn is frequently called the French horn. The origins of “French” are the thing of horn myth, but it should be noted that the proper name of the instrument is “horn.” Ironically, the design of horn used today finds its origins in German instrument makers in the 1800s, as opposed to a contrasting model made in France that is seldom used today.
Characteristics for Beginning Horn Players
It should be noted that the best instrument for a student is the instrument that the student wants to play. This is no different for the horn. With very few exceptions, any student can be an effective hornist. With that said, there are characteristics that make for a stronger beginning horn player.
Most importantly, it is imperative that horn players have strong aural skills due to the close placement of partials in the functional register of the horn. They need to be able to readily distinguish between adjacent partials, particularly because horn players often do not have the difficulties with range that are found in other brass instruments.
While lower pitched than the trumpet, the horn has the smallest diameter mouthpiece of any brass instrument. While lip and face structure varies greatly between horn players, relatively even vertical placement of the upper and lower teeth without major orthodontic issues is a benefit. Similar to trumpet, students with braces may find horn playing to be painful. Students with thick lips may find it more difficult to initially set up a controlled embouchure.
The horn can be a slightly ungainly instrument to play, so extremely small students may find difficulty in setting up their bodies correctly to play the horn. Make sure that the student can establish the proper posture discussed in the next section, and does distort the spine alignment or head placement to get to the instrument.
Many music programs find themselves with a shortage of horn players, requiring students to move to horn from other instruments. Trumpet players typically make good candidates for switching to horn, recognizing that there will be a slight adjustment in embouchure and tone production. Flute players will frequently make good candidates for horn as well due to similar aperture size and air usage.
Setting Up the Horn
The horn has one of the more unusual and non-symmetrical posture set ups in the instrument world. It is extremely important that students set their posture before adding the horn in place, placing emphasis on an alignment of the shoulders over the hips and placement of the head straight forward. Attention should always be placed on reducing tension and maintaining relaxed air flow as discussed in Getting Started with Posture, Breathing, and Embouchure.
The left hand controls rotors as well as supports the weight of the instrument. The left hand should have the shape of a C with the pinky resting in the finger hook that supports the weight of the instrument. The index, middle, and ring fingers should be placed on the rotor spatulas with the pad of the finger resting on the middle of the spatula. If the instrument is a double horn, the thumb should be placed on the Bb rotor spatula. The thumb will help support the instrument through contact on the first knuckle.
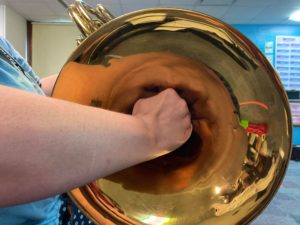
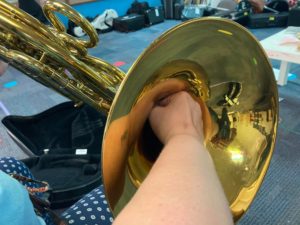
The right hand is placed in the bell of the instrument. The students should be taught to use the right hand immediately, as the instruments are designed to play sharp with a slightly unfocused tone, both of which are controlled by the right hand. The role of the right hand is to redirect the sound in the bell, not stifle it. The right hand should be relaxed with the fingers together, as though it were to be used to cup water. It should rest against the bell wall at around a 2:00 position. The weight of the instrument should rest of the first knuckle of the thumb and base knuckle of the right hand, which should be positioned right around the bell flare.
As the instrument is brought to the embouchure, it is important that the torso remains vertically aligned and relaxed without twisting. The bell should point past the right side of the body, taking care to not allow the stomach to mute the sound. The upper part of the right arm should stay roughly even vertically with the torso of the body, with both arms comfortably away from the rib cage to allow for relaxed breathing. The weight of the instrument should be on the hands, and not placed on the leg as it will encourage twisting, mute the sound of the instrument, and inhibit good tone production.
The embouchure on the horn should be slightly higher than other brass instruments, roughly two-thirds on the upper lip and one-third on the lower lip. Care should be taken to make sure the embouchure is as flat as possible vertically, with the lower jaw pushed slightly forward. The horn embouchure will typically have a slight pucker to it, though this will develop naturally. In most cases, students should not be told to pucker, as they will over-exaggerate the motion.
Horn-specific Details and Concepts
As mentioned in the previous chapters, many of the details of horn playing are common to all brass playing concerning technique, tone, and practice. Make sure to reference the general sections regarding each of these issues in addition to the horn specific details below.
Range development
Most beginning horn students comfortably find the middle of their register around the 3rd-6th partials and are able to access multiple partials relatively quickly, compared to the other brass instruments. This quick access poses a challenge for many students as the partials are close together in this register, and they quickly find themselves a second or third off of their desired pitch. As students develop more competency on the instrument, they will want to closely attend to intonation tendencies on the instrument and learn which notes should use the Bb side of the horn for easier access and improved pitch.

Follow this link for a Horn Fingering Chart.
Right hand
The right hand plays a critical role for the horn in adjusting intonation and focusing tone. It is imperative that beginning horn players place the right hand in the bell appropriately, at least in a neutral position, to ensure that they can play in tune with good tone.
The hand can be adjusted while playing to allow for the bell to be opened or closed. When the bell is more open with the hand pulled away from the bell flare, the tone becomes brighter and the pitch will adjust higher. When the bell is made more closed by pushing the hand further up the bell flare or rotating the wrist to close off the bell, the pitch becomes darker and the pitch becomes flat.
As horn players play, they primarily adjust their pitch through the manipulation of the right hand. As horn players seldom use 1-3 and 1-2-3 fingerings, the majority of the most out of tune fingering combinations are avoided, allowing for this subtle manipulation of pitch.
Double horn
Once students reach an intermediate level, they should be playing on a double horn. In many cases, beginners students start on these instruments. Double horns provide greater versatility and better intonation as compared to the single horn, though they are heavier than a single horn.
When the Bb rotor is not pressed, the horn is pitched in F. The tuning in F positions horn as an alto voice in the ensemble with access to the register that traditionally spans the treble and bass clef (for this reason, horn players should be able to readily read both clefs and be familiar with alto clef). When the Bb rotor is pressed, the instrument transposes up a Perfect 4th. It is important to note that the written notation does not change and most notes can be played on both the Bb and F sides of the instrument.
There are multiple reasons to use the Bb side of the horn. Most importantly, the Bb side of the horn provides more accurate access to the upper register of the horn, as the partials are spaced further apart and are typically more in tune. Bb fingerings are typically used for all notes on the middle of the treble clef staff and higher. Additionally, the Bb side of the horn fills in the gap in the lower register of the instrument between the 1st and 2nd partials, allowing for full chromatic access to the complete range of the horn. The Bb side of the horn can also be used to provide for alternative fingerings, either to correct characteristically out of tune pitches or allow for greater speed due to simplified fingerings.
When learning horn, students with a double horn should learn double horn fingerings first. While the F side of the instrument and single horns are fully capable of playing all chromatic intervals, the use of both sides of the double horn will help students play with greater dexterity and better intonation. Once students have learned primary fingerings, they should be exposed to alternate fingerings that provide more options in specific settings requiring agility.
Tuning the horn
Whenever the horn is tuned, the right hand should be in the bell, as hand placement alters the pitch of the instrument. When playing on a double horn, the Bb side of the horn should be tuned first, using a written C. Once the Bb side is in tune, the F side of the instrument should be tuned, ideally to a written C or G. Periodically, the individual slides for each rotor should also be tuned (see Pitch and Intonation for details).
Spit draining
Unlike other brass instruments, most horns do not have water keys or spit valves on them. In order to empty spit and condensation from the instrument, slides are removed and rotated to allow all moisture out of the instrument. Two complete rotations of the instrument toward the mouthpiece will allow all water out of the instrument.
Mutes
Stopped horn-The most common method of muting on horn is called stopped horn. The right hand pivots forward to “stop” the air by completely closing off the bell. This creates a very bright, brassy tone with greatly reduced volume. It also raises the pitch a half step, requiring the player to transpose all written pitches down by a half step.
Stopping mute-The stopping mute is an alternative to hand stopping, and allows for greater control of pitch, dynamic, and timbre.
Straight mute-The straight mute for horn also creates a brighter sound, but does not require pitch transposition. It is held in place by the right hand while being used, often coming with a strap to allow it to hang from the wrist for quick removal.
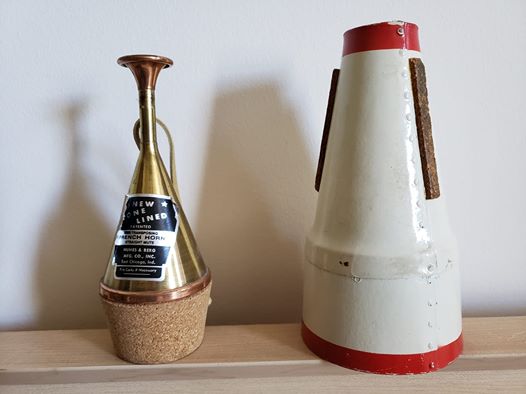
On the right-horn straight mute
Unique Issues for Horn
Hand placement-Placement of the right hand is critically important for both pitch and tone control on the horn. Beginning players will often see the right hand as unnecessary, particularly if they rest the horn on their right leg as they play. This leads to a fractured, sharp tone. Students will also allow the wrist to collapse across the bell flare or insert the hand too far into the bell, effectively stopping the horn. Students should be reminded of proper hand positioning, with the hand gently cupped and fingers together. The weight of the horn should sit on the thumb and first finger right at the point where the bell begins to flare. Picturing the hand as an extension of the natural curvature of the bell can help students understand how to position the hand. Using aural cues can help as well, by having students first exaggerate hand position to stop the horn, and then adjusting to proper position. Finally, remind students that there should be no angles in the wrist and fingers–these sharp angles can lead to improper hand position.
Partial placement-Due to the small intervals between horn partials, students will frequently over or under pitch notes, landing on the adjacent partials. Interval studies such as the Broken Remington exercises can help students identify intervals more accurately. Pitch matching games can serve the same purpose, by having students imitate a pitch played by the teacher. Teaching students about the specific intervals between partials and making sure they can identify them can also help them in at home practice so that they can ensure that they are on the correct starting pitch. For example, if the students hear a Major 3rd between two adjacent partials with open fingerings, they will know that the lower pitch is c4 and the upper pitch is e4 as that is the only spot that a Major 3rd exists in the partial series.
Trumpet embouchure-Since many horn players are transplanted trumpet players, it is important to recognize the differences in embouchure placement. The lips should be slightly puckered and the ratio of top to bottom lip should be 2:1. The horn has a warmer, less direct sound than trumpet, so students should be encouraged to keep the jaw relaxed and open, with an emphasis on full, warm air.
Double horn confusion-More advanced players become very specific about when and how they use the double horn. For beginning players, too many options can be an issue as they haphazardly use the Bb side of the instrument. When first learning the horn, keep the description of the theoretical function of the Bb side to a minimum. Instead, treat the Bb rotor as another fingering. Students should be taught that pitches above g4 utilize the Bb trigger fingerings. Pitches from g4 down should use F fingerings. Once students are more advanced, they should be taught how the Bb side of the horn functions and be introduced to alternative fingerings to adjust technique and intonation concerns.

